Wow it has been such a long time since I've posted. Spring has come and gone and yep I had tons of pictures to share with you. But they are all on my phone and guess what my new Laptop doesn't have blue tooth. What a bummer! I have to find out how to get those photos from the phone to the laptop. I don't have a smart phone. I think it will be a little tricky but I'm sure there is a way.
All Summer long I've been working on my art classes. Will have pictures to post soon. And now its the end of summer and we are entering the wonderful time of Fall. I love this time of year. Will actually I love all the seasons. They all have something special to share. But we are talking about Fall with its crisp cool morning, warm days and chilly evenings. The leaves are starting to change color, pumpkins are showing up everywhere and the longing for hot apple cider and stews have hit me. LOL
I will have pictures to show you soon... stay tuned.
Thanks for stopping by.....
XOXO
Esther
Sunday, September 23, 2012


Monday, April 23, 2012
A couple of weeks ago I started a new on line art class call Make Something beautiful. I am learning how to sketch and shade. Wow this has been such a mind binder for me. I got so frustrated when sketching. One of the things I noticed was my need to get it perfect the minute my pencil touched the paper. It was great to watch the video and see that the instructor using an eraser and taking pauses. Then the light bulb finally goes off in my head. Look she is using an eraser, erasers are your friend. LOL
The biggest thing I'm learning is to have fun with the process, relax and walk away for a while. Come back with new eyes. You can keep working on it. And no matter what... It is all good .... It really is all good! How ever it ends up.... Its all good. What an amazing realization!
Here are two sketches of my hand.


The biggest thing I'm learning is to have fun with the process, relax and walk away for a while. Come back with new eyes. You can keep working on it. And no matter what... It is all good .... It really is all good! How ever it ends up.... Its all good. What an amazing realization!
Here are two sketches of my hand.


And yes I loved the way they came out.
It's awesome you stopped by....Thanks!!
XOXO
Esther
Friday, March 30, 2012
I’m having such a blast doing the projects from the Gilded Valentine’s class. .
Here is my latest creation.
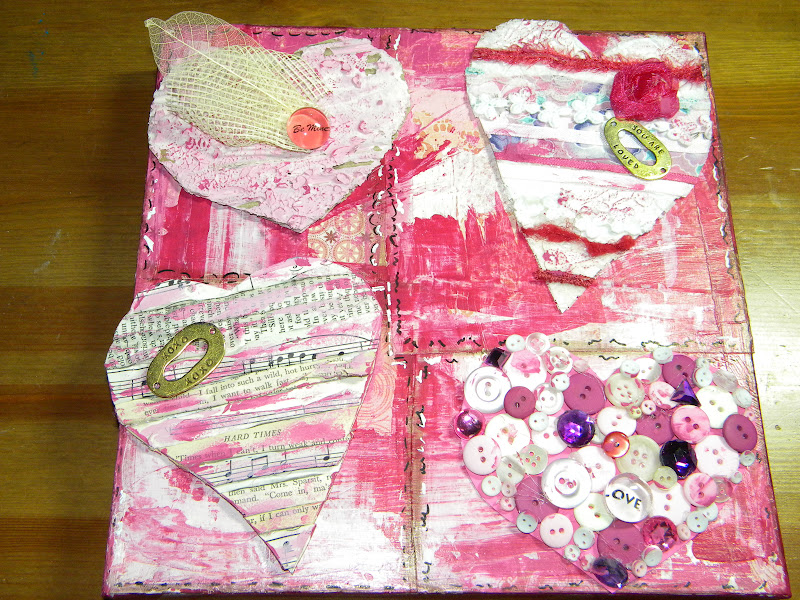
This project really helped my impatience with
waiting for paint to dry because I created the canvas and each heart
separately. Then put the whole thing together. I loved all the techniques I learned
and being messy was right up my alley LOL

I can’t say which heart I love the best, I thoroughly
enjoyed making each one. They are all so
different with their own sweet touches how can you pick just one. I’ll take all
four LOL. Thank god I’m not in a pet store … Can anyone say cat lady..... LOL
More goodies to show soon
It's awesome you stopped by....Thanks!!!XOXO
Esther
Friday, March 23, 2012
Lovely Hearts
I started taking classes from Christy Tomlinson. OMG! she is such a pep. She has you
laughing and crying and falling off your chair all within 15 seconds of each
other. True to my nature I have enrolled in almost every single class she is
currently offering. I know, I know my plate is already super full. I just
couldn’t help myself. She is just so super cute. Luckily for me, I got one for
free and the others at a discount. Throw
a sale at me and you got me. Especially if I’m already biting at the bit to get
the item. LOL. The added bonus of access to the classes for a year was not
a bad deal either. I can work at my own pace with no pressure of a deadline. Anyway or
as Christy says anywayz… I had to show
you these cute little hearts I made from the Gilded Valentines class.

I had so
much fun doing the first ones I couldn’t stop. I made three more, with plans to do more.

I stuck with more vintage look because I wanted the hearts to be ohhh so romantic LOL.
I love that I was able to make these hearts with scraps that I had on hand and I got some donations as well.

I can't wait to do more hearts with different colors. I see bright pinks and purples in the future maybe even some indigo blue ooh ohh velvet ....oh yeah more hearts definitely have to be made.
More goodies to show soon. Check out her classes I highly recommend then.

I can't wait to do more hearts with different colors. I see bright pinks and purples in the future maybe even some indigo blue ooh ohh velvet ....oh yeah more hearts definitely have to be made.
More goodies to show soon. Check out her classes I highly recommend then.
It's awesome you stopped by...Thanks!!!
XOXO
Esther
Sunday, March 18, 2012
Lemon Chicken
Everyone has that one recipe that you fall back to. You know
that one recipe that has become your signature dish, the one that when you
can’t think of what to make you make that one dish. The one that you don’t even
have to pull out the recipe card for any more because you’ve made it so many
times. The one you still love to make and eat. Mine is Lemon chicken. I can’t even remember where or how I first
came across this recipe but it’s so simple and easy to make. I’ve made this
recipe so many ways depending on what I have on hand and no matter which way I
make it, it comes out great.
The main ingredients are skinless boneless chicken breast,
flour, lemons, chicken broth, Olive oil and butter.The variations would include white wine, chicken bouillon, lemon zest, lemon juice in a bottle, lemon flavored olive oil, and roux.
I always begin with flattening the chicken breast. It not
only evens out the cooking time among the breast but is also speeds up the
cooking time. The side benefit if you had a hard day you can get the stress out
by whacking those breasts flat. Yup I like this part LOL

I heat up my cast iron pan, I love using my cast iron pan for this but truth be told I just love using my iron pots and pans period ; ) I use a combination of olive oil and butter. I would use only butter because of the flavor but I found using the olive oil with the butter, the butter doesn’t burn. It might not be true but it works this way for me.
I then coat the breasts with flour that has been salted and peppered and
brown them in the olive oil butter mixture. Once they are cook though or just cooked through I take them
out and set aside.
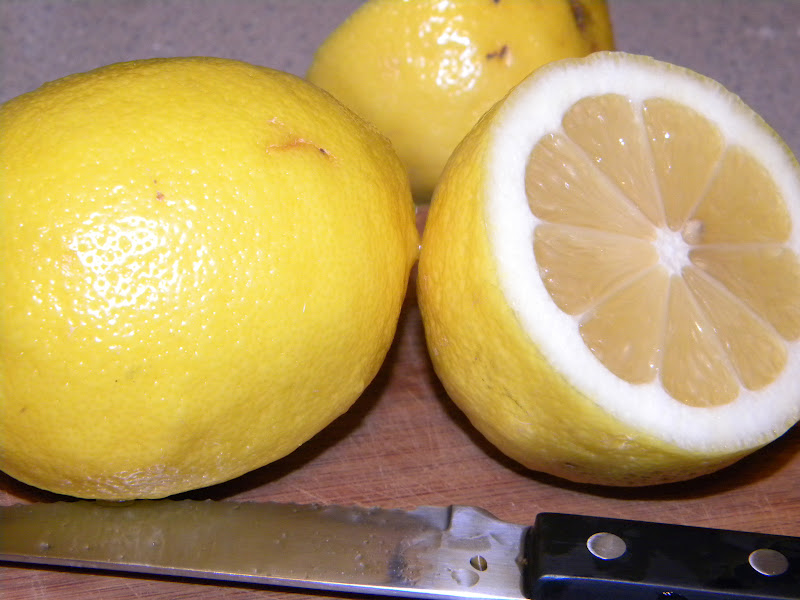
At this point is where you use all sorts of things chicken
broth, water and chicken bouillon just water or white wine a combo, you get the
idea. Depending how much sauce you want depends on how much you put in. Along
with this you add lemon something lemon flavored get the idea… to taste more tart more
lemon less tart less lemon. The last
time I made this I use Lemon juice and zest oh my god it was so good. The zest
just kicked it up a notch without adding to much tartness. Yum!

To thicken the sauce I mainly use just flour but you will
have to cook it for at least 5 min to cook the flour. I also love using roux
which is equal parts of butter (there that butter again lol) and flour cooked
till lightly brown at least for me that is how I tell it’s done. Put a little
of this in and you have thickened sauce in no time. You can also use cornstarch
in a pinch.

Once the sauce is put together I put the chicken back in and
any dripping from the plate for no more than a minute and your done and it’s
time to eat!!

Give it a try and little me your twists you put to the dish and/or what are your favorite recipes
It's awesome you stopped by!!!....Thanks
XOXO
Esther
Sunday, March 11, 2012
Valentine's Day Card
Valentine's day, that one day a year where millions of boxes of chocolates are given to your loved ones. Long stem roses are delivered and for some of us filled with angst. For this past Valentine's Day I wanted to focus on just the love part of the day. In order to be rejoice on the Love I created this really sweet simple card.

I used cream for the base and a burgundy for the frame.

I cut out a square from the center of the burgundy square that fit the heart stamp I wanted to use. I also wrapped a piece of sisal cord around one side. The cord was a bit to thick straight off the roll. I had to pull it apart to make it a bit thinner. It got quick messy with pieces of sisal everywhere. LOL

To center the the heart properly on the card, I held the burgundy frame in place stamped the heart and then glued the frame. I did it this way because if the heart stamped didn't end up quite centered than I could still move the frame a little while still keeping things looking balanced. Once the frame was glued down I than stamped the word Love on the bottom.
I had lots of fun creating this for my friends and family. I sure hope they felt the LOVE in it ; )
It's awesome you stopped by....Thanks!!!
XOXO
Esther

I used cream for the base and a burgundy for the frame.

I cut out a square from the center of the burgundy square that fit the heart stamp I wanted to use. I also wrapped a piece of sisal cord around one side. The cord was a bit to thick straight off the roll. I had to pull it apart to make it a bit thinner. It got quick messy with pieces of sisal everywhere. LOL

To center the the heart properly on the card, I held the burgundy frame in place stamped the heart and then glued the frame. I did it this way because if the heart stamped didn't end up quite centered than I could still move the frame a little while still keeping things looking balanced. Once the frame was glued down I than stamped the word Love on the bottom.
I had lots of fun creating this for my friends and family. I sure hope they felt the LOVE in it ; )
It's awesome you stopped by....Thanks!!!
XOXO
Esther
Sunday, March 4, 2012
An Altered Book
I am taking an on-line art class from Jeanne Oliver. Her art called to me which inspired me to take her e-course. Check out her website and blog I find her inspiring. In one of the classes she showed us how to make altered art Journal. This was so much fun to make use of the hardcover books you have hanging around.

Taking the book apart and adding assorted papers and binding it together again. Finally adding embellishments to the front and you have a personalized journal

I found picking out the papers to put into the journal was the must challenging part of creating this journal. I have tons of papers to chose from and narrowing it down was hard. Thinking what I was going to use the journal for once complete helped a little. Finally I just grabbed a little bit of everything and put it in. On the front cover of my journal, I added a used paint brush which I wired beads to.

I really like the way the beads looked on the paint brush.

Another embellishment I added was taking a piece of chip board and stamping the word trust on it

Then I painted the chipboard to make the word pop

Here is my final piece. I really love the way it came out. Not so sure I want to use it now. LOL
It's to pretty.
It's awesome you stopped by....Thanks!!
XOXO
Esther

Taking the book apart and adding assorted papers and binding it together again. Finally adding embellishments to the front and you have a personalized journal

I found picking out the papers to put into the journal was the must challenging part of creating this journal. I have tons of papers to chose from and narrowing it down was hard. Thinking what I was going to use the journal for once complete helped a little. Finally I just grabbed a little bit of everything and put it in. On the front cover of my journal, I added a used paint brush which I wired beads to.

I really like the way the beads looked on the paint brush.

Another embellishment I added was taking a piece of chip board and stamping the word trust on it

Then I painted the chipboard to make the word pop

Here is my final piece. I really love the way it came out. Not so sure I want to use it now. LOL
It's to pretty.
It's awesome you stopped by....Thanks!!
XOXO
Esther
Subscribe to:
Posts (Atom)